Which product for which job
| Your problem | What it is | Buy |
|---|
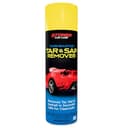
| Tar flecks on rockers and lower doors | Petroleum bitumen — needs a solvent | Stoner Tarminator |
| Tree sap spots on the hood or roof | Plant resin — needs a solvent | Stoner Tarminator |
| Bumper and windshield full of bugs | Protein — needs dwell time and a surfactant | Chemical Guys Bug & Tar (pre-wash) |
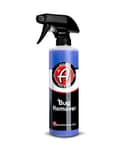
| Bugs on grille, chrome, trim and glass together | Protein across mixed surfaces | Adam’s Bug Remover |
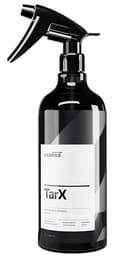
| Full decontamination before clay and polish | Everything bonded, whole car | CARPRO TarX (1 L) |
| Gritty paint and tar, same session | Iron fallout plus bitumen | CARPRO TriX |
| Badge, sticker or pinstripe adhesive | Glue residue | CARPRO TarX (listing names adhesive) |
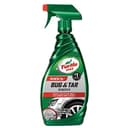
| Fresh tar, need something now | Bitumen, not yet cured | Turtle Wax T520A, from any local store |
The thing these products all do to your paint protection
This is the part the aisle does not tell you. A solvent that dissolves tar also dissolves wax. Tar is a hydrocarbon; so is most of what is protecting your paint. There is no chemistry that removes one and leaves the other untouched, and no product on this page claims otherwise — which is honest of them, but it means the responsibility for the next step is yours.
So build it into the job: treat the spot, then re-protect the panel. On a waxed car that means a quick application of wax or a quick detailer over the area you treated. On a sealed or spray-coated car, a topper over the panel. This is also the argument for doing tar removal as part of a full decontamination session rather than as a one-off: if you are going to strip protection from a panel, you may as well strip and re-do the whole car deliberately.
On ceramic coatings specifically, be careful. No listing here publishes a coating-safety statement, and we have a documented precedent on this site for why that matters: CARPRO’s own IronX LimeScale listing warns it may damage ceramic coatings, which is noted on our water spot remover roundup. Different product, same lesson — a strong chemical and a coating are not automatically compatible. Test an inconspicuous low panel, use the least aggressive product that works, and check your water behaviour afterwards.
How to remove tar without marring the paint
The single most important rule: let the chemical do the work, do not scrub. Tar is sticky and abrasive-adjacent; dragging a cloth across an undissolved tar spot is grinding a hard particle into your clear coat.
- Wash the car first, or at least the area. Removing tar from a dusty panel means working grit into the paint. Our two-bucket method is the baseline.
- Work in the shade, on cool paint. Solvents flash off fast on a hot panel and leave the tar half-dissolved.
- Saturate the spot and wait. Apply generously to a microfiber or directly to the mark and leave it. If the tar has not softened, apply more and wait longer — do not switch to pressure.
- Wipe in one direction, with a towel you are willing to bin. Tar permanently stains microfiber and the towel is now carrying abrasive residue. Do not fold it over and reuse the dirty face, and do not put it back in your paint-towel pile — see microfiber towel care.
- Repeat rather than escalate. Three gentle applications beat one aggressive scrub every time.
- Rinse the panel, then re-protect it. Solvent residue left on paint is not doing it any favours.
If a mark survives all of that, it is no longer a contaminant sitting on the surface — it has etched the clear coat, and chemistry cannot fix it. That is a paint correction job. Our guides to removing tar from car paint and removing tree sap cover the process in more depth, including the point at which to stop.
Where this fits in decontamination
Bug and tar removal is a chemical decontamination step, and chemistry always comes before mechanical work. The full order:
- Wash — remove loose dirt so later steps are not dragging it around.
- Chemical decon — tar and bug removers (this page), plus an iron remover for embedded brake dust.
- Mechanical decon — a clay bar for whatever is left bonded.
- Correct — polish out the defects now that the surface is clean.
- Protect — and this is the step you must not skip after using anything on this page.
Doing chemical decon before clay is not a detail: a clay bar dragged over a tar spot picks the tar up and then grinds it across the next panel. That is the single most common way a careful detailer puts marring into their own paint, and what paint decontamination actually is explains the sequence in full.
What not to use
- Household solvents. Acetone, nail polish remover, paint thinner and brake cleaner will all dissolve tar and will all attack clear coat, plastic trim and rubber. The products on this page are formulated to stop short of that; a hardware-shop solvent is not.
- WD-40 as a tar remover. It does soften tar, and it also leaves an oily film that nothing will stick to afterwards — including your wax. If you use it, you have added a degreasing step to your job.
- A clay bar as your first move. Clay is for what chemistry leaves behind, not for tar. Using it first contaminates the clay and risks marring.
- A pressure washer up close. Tar does not care about pressure, and close-range pressure on a tar-flecked rocker can drive grit around. Our pressure washer guide covers safe distances.
- Scrubbing with anything. Worth repeating because it is the mistake that costs clear coat.
Prevention, which is cheaper than any of this
Tar and bugs both stick far less to a slick, protected surface, and come off far more easily when they do. A ceramic coating or even a decent paint sealant on the lower third of the car and the front bumper is the highest-leverage thing you can do here — the contaminant bonds to the sacrificial layer instead of to your clear coat. The same applies to the windshield: a glass water repellent makes bug removal noticeably easier, and Aquapel’s own listing claims it makes dirt and bugs easier to clear.
And deal with it quickly. Fresh tar wipes off with a fraction of the chemical and effort that week-old sun-baked tar needs, which is the best argument for keeping the cheapest can on this page in your trunk.
Once the paint is chemically and mechanically clean, the correction stage is where the pad choice starts to matter. Our polishing pad roundup covers the grade range to use and how many pads one car actually needs.