The sequence, and where the money goes
1. Wash. Two buckets, two grit guards, a clean mitt. Everything after this assumes the loose dirt is gone. If the wash puts swirls in, the correction is just cleaning up after it.
2. Decontaminate chemically, then mechanically. An iron remover takes out embedded brake dust and fallout, a tar remover handles the solvent-soluble half, and clay takes whatever is still bonded. Our decontamination kit page lists one product per stage.
3. Inspect and test. Light on, defect found, smallest area, least aggressive pad and liquid combination. This is the whole skill. Do not start with the most aggressive thing you own.
4. Compound, then refine. Cut until the defect leaves, then a finishing polish on a soft pad to remove the haze that cutting left. Skipping the refine step is why some corrected cars look flat rather than wet.
5. Protect, the same day.Corrected paint is bare paint. A sealant is the low-effort answer and a coating is the long one — see sealants or the sub-$100 coating page.
Three compatibility rules nobody prints on the box
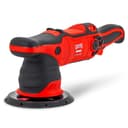
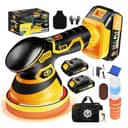
Pad to plate.A pad roughly a half-inch larger than the backing plate is the forgiving conventional fit: the G9’s 6 in plate with 6.5 in pads. A much larger pad flexes and robs the machine of rotation; a pad smaller than the plate puts the plate edge within reach of your paint. Our pad roundup has a fitment table.
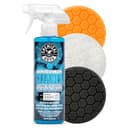
Abrasive to pad.Cut with a cutting pad, refine with a finishing pad. A finishing polish on an aggressive pad hazes; a compound on a soft pad spends your afternoon achieving very little. This is what the sampler kit is for — it lets you vary one thing at a time.
Liquid to paint. Older single-stage and lacquer paint behaves differently from a modern hard clear coat, and not every compound is rated for both. If your car is old or has been resprayed, check what the bottle says it is rated for before you touch it, and read compound vs polish first.
What this kit deliberately leaves out
A rotary polisher. A rotary spins the pad under power at all times, which is how clear coat gets burned through in a moment of inattention. Every machine in this kit is a random orbital. See polisher vs buffer for the distinction.
A long-throw machine.A 15 mm or 21 mm orbit corrects a large car faster. It does not produce a better finish — that comes from the pad, the liquid and your arm speed. If you want the trade argued with published figures, read 8 mm vs 15 mm and G9 vs G15.
A paint depth gauge. They exist, they are useful on a car you are correcting repeatedly or buying unseen, and they cost more than most of this kit. For a first correction with a random orbital and a conservative test-spot approach, the light is the better purchase.
Can you correct paint by hand?
Partly. Meguiar’s Ultimate Compound and Ultimate Polish are both rated for hand application, and a single scratch or a small panel is a reasonable hand job — which is why a hand test is a sensible way to confirm your combination before you commit the machine. What hand work cannot do is correct a whole car to an even finish, because you cannot keep pressure and dwell consistent across a bonnet. Our hand polishing guide is honest about where the line is.
For the full method rather than the shopping list, the paint correction guidewalks through stages, test spots and how to know when to stop — and how to remove swirl marks is the specific job most people are actually here for.
About the prices on this page
Every figure comes from the live price layer and carries the date it was read. Nothing on this page stores a price, so the total cost of the kit is whatever the table says today rather than what it said when the page was written. Where a live price is unavailable you will see “Check price on Amazon” rather than a stale number.