Clay & Coat

Best Headlight Restoration Kit

Headlight restoration kits compared on method and whether they seal - because a kit that skips UV protection yellows again within a year.

By Stephen V.Last updated How we pick

Headlights are polycarbonate, not glass, and they leave the factory with a thin UV- resistant hard coat on the outside. Sunlight destroys that coat over years. Once it goes, the plastic underneath oxidizes directly — and the result is the milky yellow haze that scatters your beam instead of projecting it.

This is a safety item, not a cosmetic one. Badly hazed lenses throw a fraction of the light down the road that clear ones do, and much of what they do emit goes sideways as glare. It is also, in most places, an inspection point.

The critical thing to understand about every kit here: restoration removes the damaged layer, and the factory UV coating with it. If the kit does not then seal the lens, you have bare polycarbonate exposed to sunlight, which oxidizes faster than the original ever did. That is why so many restorations look superb for six months and terrible after eighteen.

How this is funded:we earn a commission if you buy through our links, at no extra cost to you. It never changes which product we recommend, and we’ll tell you when we’d skip one. Full disclosure.

Quick picks

Ranked on published specs, coverage and buyer fit. Select a row to jump to the full write-up. We haven’t tested these in a lab — here is exactly what we do instead.

#ProductBest forPrice
1
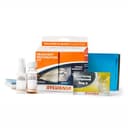
Sylvania Headlight Restoration Kit

Sylvania Headlight Restoration Kit

From a company that makes the bulbs behind the lens, and the most complete of the sanding-based kits. It includes a UV-blocking sealing step, which is the part cheap kits omit and the reason cheap results yellow again within a year.

Best overall
$19.99 · View on Amazon

$22.7512% off

Price as of August 31, 2026. #ad How we’re funded

2
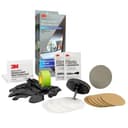
3M Ultra Headlight Restoration Kit 39195

3M Ultra Headlight Restoration Kit 39195

3M invented most of the abrasives in this category, and this kit shows it: graded sanding discs, a compound and a wax protectant, plus the masking tape that stops you sanding the paint around the lens.

Best abrasives
$14.49 · View on Amazon

$15.507% off

Price as of August 31, 2026. #ad How we’re funded

3
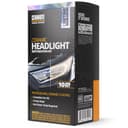
Cerakote Ceramic Headlight Restoration Kit

Cerakote Ceramic Headlight Restoration Kit

The no-power-tools option, and a genuinely different approach: ten wipes that chemically restore and then leave a ceramic layer behind. If the idea of taking sandpaper to your headlights is the thing stopping you, this removes that objection.

Best without power tools
$17.95 · View on Amazon

$19.9510% off

Price as of August 31, 2026. #ad How we’re funded

4
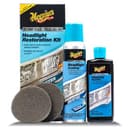
Meguiar's Two Step Headlight Restoration Kit

Meguiar's Two Step Headlight Restoration Kit

Two steps, which is about the right amount of complexity for moderately hazed lenses. It sits between the wipe kits and the full sanding systems - more capable than the former, far quicker than the latter.

Best for light haze
$21.24 · View on Amazon

$24.9915% off

Price as of August 31, 2026. #ad How we’re funded

5
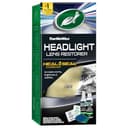
Turtle Wax Headlight Restoration Kit

Turtle Wax Headlight Restoration Kit

The cheapest way to find out whether your headlights are restorable at all. On lightly hazed lenses it does the job; on badly oxidized ones it will show you the limit of what a low-cost kit can do.

Best budget pick
$11.79 · View on Amazon

Price as of August 31, 2026. #ad How we’re funded

The picks in full

#1Top pick — Best overall

Sylvania Headlight Restoration Kit

From a company that makes the bulbs behind the lens, and the most complete of the sanding-based kits. It includes a UV-blocking sealing step, which is the part cheap kits omit and the reason cheap results yellow again within a year.

Strengths

  • Includes a proper sealing/clear-coat stage, not just abrasives
  • Multi-stage sanding takes on genuinely severe yellowing
  • From an OEM lighting manufacturer

Trade-offs

  • The most labor-intensive kit here - sanding takes real time per lens
  • Sanding is irreversible if you skip grits or rush
What it isMulti-stage sanding kit with UV sealing step
Size1 kit
CoverageNot published
MethodWet sanding + seal
Includes sealantYes
Rated durabilityNot published

Specs read from the product listing, on August 18, 2026. “Not published” means the brand does not state that figure.

#2Best abrasives

3M Ultra Headlight Restoration Kit 39195

3M invented most of the abrasives in this category, and this kit shows it: graded sanding discs, a compound and a wax protectant, plus the masking tape that stops you sanding the paint around the lens.

Strengths

  • Graded 500/800 sanding discs and compound from an abrasives specialist
  • Includes masking tape - the detail that protects surrounding paint
  • Removes heavy cloudy yellowed haze rather than just polishing it

Trade-offs

  • Finishes with a wax protectant rather than a true UV clear coat
  • Drill required to get reasonable results in reasonable time
What it isSanding disc kit with compound, tape and wax protectant
Size1 kit
CoverageNot published
MethodDrill-driven sanding + compound
Includes sealantWax protectant
Rated durabilityNot published

Specs read from the product listing, on August 18, 2026. “Not published” means the brand does not state that figure.

#3Best without power tools

Cerakote Ceramic Headlight Restoration Kit

The no-power-tools option, and a genuinely different approach: ten wipes that chemically restore and then leave a ceramic layer behind. If the idea of taking sandpaper to your headlights is the thing stopping you, this removes that objection.

Strengths

  • No power tools and no sanding - a 10-wipe process
  • Leaves a ceramic protective layer rather than bare polycarbonate
  • Very hard to damage anything by getting it wrong

Trade-offs

  • Less effective than sanding on severely oxidized, deeply yellowed lenses
  • Single-use wipes mean redoing it needs another kit
What it isNo-sanding 10-wipe ceramic restoration kit
Size10-wipe kit
CoverageNot published
MethodChemical wipe + ceramic coating
Includes sealantCeramic coating
Rated durabilityNot published

Specs read from the product listing, on August 18, 2026. “Not published” means the brand does not state that figure.

#4Best for light haze

Meguiar's Two Step Headlight Restoration Kit

Two steps, which is about the right amount of complexity for moderately hazed lenses. It sits between the wipe kits and the full sanding systems - more capable than the former, far quicker than the latter.

Strengths

  • Only two stages, so it is quick and hard to get wrong
  • More corrective ability than a chemical-wipe kit
  • Familiar, widely stocked brand

Trade-offs

  • Not enough for lenses that have gone properly opaque
  • Protection stage is lighter than a dedicated UV clear coat
What it isTwo-stage headlight restoration kit
Size1 kit
CoverageNot published
MethodTwo-stage clean and polish
Includes sealantNot published
Rated durabilityNot published

Specs read from the product listing, on August 18, 2026. “Not published” means the brand does not state that figure.

#5Best budget pick

Turtle Wax Headlight Restoration Kit

The cheapest way to find out whether your headlights are restorable at all. On lightly hazed lenses it does the job; on badly oxidized ones it will show you the limit of what a low-cost kit can do.

Strengths

  • The lowest-cost kit in this group
  • Rated for cars, trucks and SUVs
  • Simple enough to finish in under an hour

Trade-offs

  • Least durable result - expect to redo it sooner
  • Little protection against the UV that caused the problem
What it isBudget headlight restoration kit
Size1 kit
CoverageNot published
MethodClean and polish
Includes sealantNot published
Rated durabilityNot published

Specs read from the product listing, on August 18, 2026. “Not published” means the brand does not state that figure.

Two approaches, and how to choose

Wet sanding

Graded abrasive discs cut the oxidized layer away, working from coarse to fine, then a compound polishes the surface back to clarity. This is the only method that reliably fixes badly yellowed, nearly opaque lenses — there is no chemical shortcut when the damage is that deep. It is also the method with real downside risk: skip a grit, or stop before the finer stages, and you leave sanding marks that scatter light just as badly as the haze did.

Chemical wipe systems

No sanding, no drill: a solvent wipe dissolves the oxidized surface and a second wipe leaves a ceramic protective layer. On light to moderate haze the results are genuinely good, and it is essentially impossible to damage anything. On a lens that has gone properly opaque it will not have the correcting power — it removes a microscopic layer, not a visible one.

The specification that actually matters

Look at what the kit leaves behind. A dedicated UV sealant or ceramic coating is what makes a restoration last. A wax protectant is better than nothing but washes off in months. Nothing at all means you are on the clock from the day you finish. Note that none of these brands publish a rated durability figure, so judge the kit by whether it seals, not by its claims.

Doing it properly

Mask generously.Tape off all the paint around the lens — two layers, extending well past the edge. Sanding discs and drill pads skip, and a sanded fender is a much bigger problem than a hazy headlight. The kits that include tape do so because this is the most common mistake.

Keep it wet, and do not skip grits.Wet sanding means genuinely wet — spray frequently. Work each grit until the entire surface has a uniform matte appearance with no glossy patches, then move to the next. Skipping a grade is what leaves marks the compound cannot remove, and the fix is to go back and start again.

Work across, then up and down.Alternating direction between grits makes it obvious when the previous grit’s scratches are gone, because you can see the old pattern disappearing.

Seal it, the same day.Clean the lens with alcohol so the surface is chemically bare, then apply the kit’s sealant properly. If your kit has no sealing stage, buy a glass or trim ceramic coatingand use that instead — it is the difference between a repair that lasts years and one that lasts a season. Then keep it protected the way you would any exposed surface, because the sun that caused this has not gone anywhere.

When to stop and replace

If the hazing is insidethe lens — condensation, a failed seal, or internal reflector degradation — no amount of external work will help, and sanding a lens that is cracked or crazed can make it worse. Look at the lens closely in good light before you start: external oxidation feels rough and looks uniform; internal damage looks like it is under glass, because it is.

Frequently asked questions

How long does headlight restoration last?

Entirely dependent on whether the lens gets sealed. Restoration removes the oxidized layer and the remains of the factory UV coating with it, so an unsealed lens is bare polycarbonate facing the sun and can re-yellow within a year. A kit that finishes with a genuine UV sealant or ceramic coating lasts substantially longer. None of these brands publish a rated durability figure, so judge by whether it seals rather than by the claim on the box.

Do no-sanding headlight kits actually work?

On light to moderate haze, yes - a solvent wipe dissolves the thin oxidized surface layer and a second wipe leaves a protective ceramic coating, with no risk of damaging anything. On a lens that has gone properly opaque or deeply yellow they run out of correcting power, because they remove a microscopic layer rather than a visible one. For severe cases, wet sanding is the only method that reliably works.

Can I use toothpaste to restore headlights?

It is mildly abrasive and will make a slight difference on very light haze, which is why the tip circulates. It is not a real solution: it has no meaningful cut for genuine oxidation, and crucially it leaves no UV protection at all, so whatever improvement you get starts degrading immediately. A basic kit costs about the same as a tube of toothpaste and includes the sealing step that actually matters.

Will restoring my headlights damage the paint around them?

It can if you do not mask properly, and this is the most common way a restoration goes wrong. Sanding discs and drill-driven pads skip off the curved edge of a lens and onto the surrounding fender or bumper. Tape off all adjacent paint with two layers extending well past the lens edge before you start - several kits include tape for exactly this reason.

When should I replace headlights instead of restoring them?

When the damage is internal. If the haze is behind the lens surface - condensation inside the housing, a failed seal, or a degraded reflector - no external restoration reaches it. Same if the lens is cracked or crazed, where sanding can worsen the damage. External oxidation feels rough to the touch and looks uniform across the surface; internal damage looks like it is under glass, because it is.

Sources

Keep reading