Clay & Coat

How to Restore Headlights

Why lenses go yellow, the wet-sand-polish-seal order that fixes it, and the step most people skip that makes the job last a year instead of a month.

By Stephen V.Last updated How we pick

How this is funded: we earn a commission if you buy through our links, at no extra cost to you. It never changes which product we recommend, and we’ll tell you when we’d skip one. Full disclosure.

A yellowed headlight is not a dirty headlight, and that single fact is why most attempts to fix one fail. Chemical Guys’ own guide to oxidized headlights describes the mechanism: modern lenses are polycarbonate protected by a factory UV-protective film, sunlight degrades that film, and once it is gone the raw plastic underneath oxidizes. What you are looking at is a damaged surface layer of the lens itself.

Which means there are exactly two things any real fix has to do: remove the degraded material, and replace the UV protection you just removed with it. Nearly every disappointing result — the toothpaste trick, the WD-40 trick, the cheap kit that looked great for a month — is a method that does the first thing partially and the second thing not at all.

What actually causes it

Three contributors, per the manufacturer guidance:

  • UV degradation. The primary cause. The factory coating breaks down under sun exposure and stops protecting the polycarbonate.
  • Road contaminants. Bug splatter, road salt, harsh chemicals and exhaust all contribute to surface wear, which accelerates the coating’s failure.
  • Heat and age. Bulb heat and repeated temperature cycling make the plastic brittle and cloudy from the inside of the material outward.

Note what is not on that list: anything you can wash off. A lens that still looks yellow after a thorough clean with glass cleaner and a clay bar is oxidized, not soiled, and needs material removed.

The order of operations

Chemical Guys’ published method is four stages, and the sequence is not negotiable:

  1. Clean and tape off. Wash the headlight and the area around it, dry it, then mask the surrounding paint with painter’s tape.
  2. Wet sand the oxidation. “Start with a coarser grit to cut through the yellowing, then work up through finer grits, keeping everything wet the whole time.”
  3. Polish for clarity. A restoration polish removes the fine-sanding haze.
  4. Seal it. Apply a UV sealant or coating.

Two notes on reading that method honestly. Chemical Guys’ guide does not name specific grit numbers and publishes no cure times, so neither will we — use the grits and the cure time printed in your own kit’s instructions. And the reason step 4 is not optional is stated in the same source: “Sanding removes the factory UV coating, leaving bare plastic exposed. A UV sealant replaces that protection, blocking sun damage.” Skip it and your freshly restored lenses “will cloud up again more quickly than a sealed lens” — faster, in other words, than the factory lens that took eight years to get this bad, because the factory lens at least had a coating.

Below: the kits that include that sealing stage, and the ones that quietly do not.

Kits that include the step that matters

Ranked on published specs, coverage and buyer fit. Select a row to jump to the full write-up. We haven’t tested these in a lab — here is exactly what we do instead.

#ProductBest forPrice
1
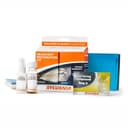
Sylvania Headlight Restoration Kit

Sylvania Headlight Restoration Kit

From a company that makes the bulbs behind the lens, and the most complete of the sanding-based kits. It includes a UV-blocking sealing step, which is the part cheap kits omit and the reason cheap results yellow again within a year.

Best overall — multi-stage sanding plus a sealing step
$22.75 · View on Amazon

Price as of November 12, 2026. #ad How we’re funded

2
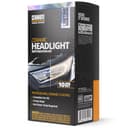
Cerakote Ceramic Headlight Restoration Kit

Cerakote Ceramic Headlight Restoration Kit

The no-power-tools option, and a genuinely different approach: ten wipes that chemically restore and then leave a ceramic layer behind. If the idea of taking sandpaper to your headlights is the thing stopping you, this removes that objection.

Best if you will not sand
$17.95 · View on Amazon

$19.9510% off

Price as of November 12, 2026. #ad How we’re funded

3
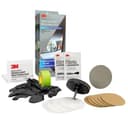
3M Ultra Headlight Restoration Kit 39195

3M Ultra Headlight Restoration Kit 39195

3M invented most of the abrasives in this category, and this kit shows it: graded sanding discs, a compound and a wax protectant, plus the masking tape that stops you sanding the paint around the lens.

Best abrasives — but read the final stage
$14.49 · View on Amazon

$15.507% off

Price as of November 12, 2026. #ad How we’re funded

#1Top pick — Best overall — multi-stage sanding plus a sealing step

Sylvania Headlight Restoration Kit

From a company that makes the bulbs behind the lens, and the most complete of the sanding-based kits. It includes a UV-blocking sealing step, which is the part cheap kits omit and the reason cheap results yellow again within a year.

The most complete sanding-based kit in our registry, and the one we would buy, because it includes the stage the cheap kits leave out: its listing states a UV-blocking sealing step alongside the multi-stage abrasives. Everything on this page about why sealing matters is the argument for this kit. Sylvania also makes the bulbs behind the lens, which is at least a relevant kind of expertise.

Honest about the cost: this is the most labour-intensive option here. Multi-stage wet sanding takes real time per lens, and the listing itself notes that sanding is irreversible if you skip grits or rush. Sylvania publishes no rated durability figure for the result, so we will not quote one. What we can say is that it is the only kit here whose own spec row answers “includes sealant” with an unqualified yes.

Strengths

  • Includes a proper sealing/clear-coat stage, not just abrasives
  • Multi-stage sanding takes on genuinely severe yellowing
  • From an OEM lighting manufacturer

Trade-offs

  • The most labor-intensive kit here - sanding takes real time per lens
  • Sanding is irreversible if you skip grits or rush
What it isMulti-stage sanding kit with UV sealing step
Size1 kit
CoverageNot published
MethodWet sanding + seal
Includes sealantYes
Rated durabilityNot published

Specs read from the product listing, on August 18, 2026. “Not published” means the brand does not state that figure.

#2Best if you will not sand

Cerakote Ceramic Headlight Restoration Kit

The no-power-tools option, and a genuinely different approach: ten wipes that chemically restore and then leave a ceramic layer behind. If the idea of taking sandpaper to your headlights is the thing stopping you, this removes that objection.

The honest alternative for the large number of people who read the sanding section above and decided against it. This is a ten-wipe chemical process — no drill, no sandpaper, no masking, very little that can go catastrophically wrong — and it leaves a ceramic layer behind rather than bare polycarbonate, which addresses the UV problem by a different route.

The trade-off is capability, and its own listing states it: less effective than sanding on severely oxidized, deeply yellowed lenses, and the single-use wipes mean redoing it needs another kit. So this is the right first attempt on moderately hazed lenses, and the wrong tool for a lens that has gone properly opaque. If you are unsure which you have, this is the cheaper mistake to make.

Strengths

  • No power tools and no sanding - a 10-wipe process
  • Leaves a ceramic protective layer rather than bare polycarbonate
  • Very hard to damage anything by getting it wrong

Trade-offs

  • Less effective than sanding on severely oxidized, deeply yellowed lenses
  • Single-use wipes mean redoing it needs another kit
What it isNo-sanding 10-wipe ceramic restoration kit
Size10-wipe kit
CoverageNot published
MethodChemical wipe + ceramic coating
Includes sealantCeramic coating
Rated durabilityNot published

Specs read from the product listing, on August 18, 2026. “Not published” means the brand does not state that figure.

#3Best abrasives — but read the final stage

3M Ultra Headlight Restoration Kit 39195

3M invented most of the abrasives in this category, and this kit shows it: graded sanding discs, a compound and a wax protectant, plus the masking tape that stops you sanding the paint around the lens.

3M makes most of the abrasives in this category and it shows: this kit ships graded 500 and 800 grit sanding discs with a compound and the masking tape that protects the surrounding paint. On genuinely heavy, cloudy yellowing, the abrasive quality is the best here, and the listing is explicit that a drill is required to get reasonable results in reasonable time.

One thing to go in with your eyes open about, and it is the reason this is third rather than first on a page about sealing: the kit finishes with a wax protectant rather than a true UV clear coat. A wax is not what Chemical Guys means by “a UV sealant replaces that protection.” Use this kit for its abrasives and plan to apply a dedicated UV sealant afterwards, or accept that you will be redoing it sooner.

Strengths

  • Graded 500/800 sanding discs and compound from an abrasives specialist
  • Includes masking tape - the detail that protects surrounding paint
  • Removes heavy cloudy yellowed haze rather than just polishing it

Trade-offs

  • Finishes with a wax protectant rather than a true UV clear coat
  • Drill required to get reasonable results in reasonable time
What it isSanding disc kit with compound, tape and wax protectant
Size1 kit
CoverageNot published
MethodDrill-driven sanding + compound
Includes sealantWax protectant
Rated durabilityNot published

Specs read from the product listing, on August 18, 2026. “Not published” means the brand does not state that figure.

What the kits publish — and do not

The pattern below is the most useful thing on this page when you are standing in a shop comparing boxes. Every figure is read from the listing; every blank is a figure the maker does not state.

KitMethodSealing stageRated durability
SylvaniaWet sanding + sealYesNot published
CerakoteChemical wipe + ceramicCeramic coatingNot published
3M Ultra 39195Drill-driven sanding (500/800 grit) + compoundWax protectant onlyNot published
Meguiar’s Two StepTwo-stage clean and polishNot publishedNot published
Turtle WaxClean and polishNot publishedNot published

Read that last column honestly: not one of these makers publishes a durability figure for the restored lens. That is why this page will not tell you a restoration lasts eighteen months or three years. What the sources do support is the relative claim, and Chemical Guys states it plainly: an unsealed lens “will cloud up again more quickly than a sealed lens.” Choose on whether a sealing stage is in the box, not on a number nobody prints.

The methods that do not work, and the one that half-works

Three home remedies come up constantly, and they deserve a straight answer:

  • Toothpaste. It is a mild abrasive, so it genuinely does abrade the oxidized surface layer, and a lightly hazed lens will look better for a few weeks. What it cannot do is the part that matters: it removes a little of the degraded layer and leaves the rest, and it adds no UV protection whatsoever. You have made the lens slightly clearer and left it just as exposed.
  • WD-40 or any oil. This one is purely cosmetic and actively misleading. Oil fills the micro-roughness of the oxidized surface so light passes through instead of scattering, and the lens looks dramatically better — for about a week, until the oil washes off. Nothing has been restored. Worse, it can soften some plastics and it will attract dust.
  • Bug spray. Do not. The solvents attack polycarbonate, which is precisely why the lens briefly looks clearer: you are dissolving the surface. The damage continues after the shine fades.

All three share the same flaw, and it is the central point of this page. Oxidation is not dirt on the lens; it is the degradation of the lens itself after its factory UV coating failed. Anything that does not both remove the degraded material and replace the UV protection is a temporary cosmetic fix.

When to stop and buy a new headlight

Restoration is the right answer surprisingly often, but not always. Replace rather than restore when:

  • There is moisture or condensation inside the lens. The housing seal has failed. Polishing the outside does nothing about the inside, and water inside a lamp assembly will keep coming back.
  • The lens is cracked or stone-chipped through. Sanding a crack makes it worse, and water gets in.
  • The hazing is on the inside surface. Shine a torch through it; if the cloudiness is internal, no amount of external work will reach it.
  • The lens has already been sanded thin. Each restoration removes material. There is a finite number of times you can do this.

One more reason to take this seriously rather than treat it as cosmetic: a yellowed, scattering lens puts less light where you need it and more light where oncoming drivers do not want it. That is a visibility issue at night, not just an appearance one — and it is the same logic behind keeping your windshield treated and your glass genuinely clean.

Keeping them clear afterwards

The failure you are fixing was a UV failure, so prevention is UV protection, reapplied. Once the lens is restored and sealed, the maintenance is simple: wash the lenses as part of the car rather than letting bug splatter and road film bake on, and refresh the protective layer when water stops beading on the lens the way it did when it was new.

One important exclusion, because it catches people out: do not reach for a general-purpose trim protectant. 303 Aerospace Protectant, which is otherwise an excellent UV product for vinyl, plastic and rubber, states on its own maker page that it is not recommended for clear plastics, gauge panels or headlights. Use a product sold for headlights. Our headlight kit roundup compares every kit on exactly this question of whether and how it seals.
A note on safety. Wet sanding a headlight is irreversible. You are removing material from a safety component, and a lens sanded unevenly or left unsealed will scatter light rather than focus it. Tape off the surrounding paint before you start, keep the surface wet throughout, never skip a grit in the sequence, and do not sand a lens that is cracked or has moisture inside it — that one needs replacing, not restoring. If your headlights are badly hazed and you are not confident, a no-sanding chemical kit is the safer first attempt.

Frequently asked questions

Why do headlights turn yellow?

Modern lenses are polycarbonate with a factory UV-protective film on the outside. Chemical Guys' guidance describes the failure chain: sunlight degrades that film, which exposes the raw plastic underneath to oxidation, and the oxidized surface scatters light instead of transmitting it, which reads as yellow haze. Bug splatter, road salt, harsh chemicals and exhaust accelerate it, and bulb heat with repeated temperature cycling makes the plastic brittle and cloudy.

Do you have to sand headlights to restore them?

Not always. Sanding is the most capable approach and the only one that reliably fixes deeply yellowed, opaque lenses, because it physically removes the degraded layer. For moderately hazed lenses, a no-sanding chemical kit such as the Cerakote ten-wipe system can be enough, and its own listing is honest that it is less effective on severely oxidized lenses. Sanding is also irreversible, so if you are unsure, try the chemical route first.

What grit sandpaper do you use on headlights?

Follow the grits in your own kit rather than a generic sequence, and never skip one. The 3M Ultra kit in our registry publishes graded 500 and 800 grit discs on its listing. Chemical Guys' own guide describes the principle without naming numbers: start with a coarser grit to cut through the yellowing, work up through finer grits, and keep everything wet the whole time. Each grit's job is to remove the scratches the previous one left.

Do I have to seal headlights after sanding?

Yes, and this is the step that decides whether the job lasts. Chemical Guys states it directly: 'Sanding removes the factory UV coating, leaving bare plastic exposed. A UV sealant replaces that protection, blocking sun damage.' Without sealing, the same guide says freshly restored lenses will cloud up again more quickly than a sealed lens. A kit that finishes with a wax protectant rather than a UV clear coat is not doing this job.

Does toothpaste actually work on headlights?

Partly, and temporarily. Toothpaste is a mild abrasive, so it removes some of the oxidized surface layer and a lightly hazed lens will look better. What it does not do is remove the full degraded layer or add any UV protection, so the oxidation continues from where you left it. Treat it as a quick cosmetic improvement before selling a car, not as a restoration.

How long does a headlight restoration last?

No manufacturer in our registry publishes a durability figure for a restored lens, so we will not invent one. What the sources support is the comparison rather than the number: a sealed lens stays clear substantially longer than an unsealed one. Real-world life depends on how much sun the car sits in, whether a true UV clear coat was applied, and how thoroughly the degraded layer was removed before sealing.

Sources

  • Chemical Guys — How To Restore Oxidized Headlights — Manufacturer guide: yellowing starts when the factory 'UV-protective film over the polycarbonate lens' degrades in sunlight and exposes raw plastic to oxidation, helped along by bug splatter, road salt, harsh chemicals and exhaust, and by bulb heat and temperature cycling making the plastic brittle and cloudy; the method is wash and tape off the surrounding paint, wet sand starting with a coarser grit and working up through finer grits 'keeping everything wet the whole time', polish out the sanding haze, then seal; 'Sanding removes the factory UV coating, leaving bare plastic exposed. A UV sealant replaces that protection, blocking sun damage'; without sealing, 'your freshly restored lenses will cloud up again more quickly than a sealed lens'. The guide names no specific grit numbers and publishes no cure times (accessed October 5, 2026)
  • Griot's Garage — How-To: Polish — Machine polishing removes swirls, light scratches, water spots and oxidation; work small sections and start least-aggressive (accessed July 18, 2026)
  • Gold Eagle Co. (303 Products) — 303 Aerospace Protectant — Maker page: matte finish with no oily or greasy residue; claims it blocks up to 98% of UV radiation if used properly and consistently; use on clean, dry surfaces, wipe completely dry, extra buffing helps; reapply every 3-5 weeks; not recommended for clear plastics, unfinished leather, gauge panels or headlights (accessed September 18, 2026)
  • Gtechniq — Everything You Need to Know About Ceramic Coatings — Manufacturer explainer: ceramic coatings are SiO2-based, bond to the clear coat, are hydrophobic, and act as a sacrificial protective layer that lasts multiple years (accessed July 18, 2026)

Keep reading