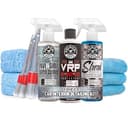
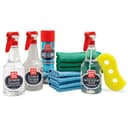
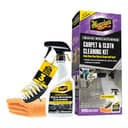
The five jobs, and which kit covers which
Work out which of these five your car actually needs before you spend anything. Most people need three of them and buy a kit that covers a different three.
1. Hard surfaces: dash, doors, console
This is the job every kit covers, because it is the easy one. What separates a good product from a bad one is the finish it leaves. A cleaner that dries to a wet-look gloss looks impressive for a week and then holds dust and throws windshield glare; a matte or satin finish looks like the car did when it was new. If a kit only gives you a combined cleaner-and-dressing, you have no way to clean without also dressing. The full field is in our interior cleaner comparison.
2. Fabric seats and carpet
The job kits most often fake. An all-surface cleaner will lift surface dirt from cloth, but a coffee ring that has soaked into the weave needs a dedicated carpet and upholstery product plus agitation. That is why one pick above is a drill brush and one is built around an odor-neutralizing carpet cleaner: on set-in stains, agitation does more work than chemistry does. Once it is clean, a fabric protector is the cheap step that turns the next spill into a wipe rather than a project.
3. Leather
Leather is two steps, not one: clean it, then condition it. Most interior kits give you neither and quietly assume your seats are cloth. Skipping the conditioner is the common mistake, and it matters most on a car parked outside, where sun through glass dries and cracks a seat bolster long before wear does. If your kit has no leather product, add one from the leather cleaner comparison rather than using an all-purpose cleaner on hide.
4. Glass
The inside of a windshield collects a film that general-purpose cleaners smear rather than remove, and the wrong formula can damage aftermarket tint. A dedicated, ammonia-free glass cleaner and two towels - one to clean, one to buff dry - is the entire trick. Kits are split roughly evenly on whether they include one; see the glass cleaner picks if yours does not.
5. Vents, seams and crevices
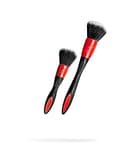
The job that separates a wiped cabin from a detailed one, and the one no chemical can do for you. Dust lives in vent slats, seat stitching, cup holders and the gap around the shifter, and it comes straight back out onto the surfaces you just cleaned. Brushes are cheap, they last for years, and they are the single highest-impact tool on this page.
Kit or build your own?
An interior kit wins on price per bottle and on removing the guesswork. It loses when it forces a compromise on the one job you care most about - which happens more often with interiors than with exteriors, because cabins differ so much. A leather-seat commuter car and a cloth-seat family car with a toddler in it need almost nothing in common.
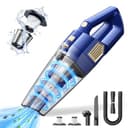
The honest rule is this: buy the kit if it covers three or more of your five jobs, and buy singles if it does not. Building your own from category winners costs more up front, but nothing in the box is wasted, and each bottle is the best in its class rather than the one that fit the bundle price. Our interior detailing hub has a comparison behind each of the five jobs above, and the car vacuum guide covers the tool none of these kits include.
What no interior kit includes
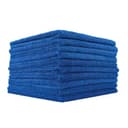
Three things, and they are the same three every time. A vacuum, because vacuuming is genuinely the first step and a cleaner applied over loose grit just makes mud. Enough microfiber, because interior work eats towels faster than exterior work does - a towel loaded with dressing smears the next panel, and the towel that did the door sills should never touch a screen. And brushes, unless you bought the one kit above that includes them — and if you are buying them separately, our detailing brush picksexplain why the small brush is the one you will reach for most and why boar’s hair and nylon are not interchangeable.
The order to work in
Interiors are done top-down and dry-to-wet, and doing it out of order is why a cabin can look worse after an hour of effort. Remove everything loose - mats, trash, car seats - first. Brush and vacuum next, working headliner down to carpet so the dust you dislodge falls onto surfaces you have not done yet. Then clean hard surfaces, then fabric or leather, then glass last, because glass is where every other step's overspray lands. Dry the mats fully before they go back in; a damp mat under a rubber liner is how a cabin starts to smell.
The long-form version, with what can go wrong at each stage, is our interior detailing walkthrough. For the two problems that send people looking for a kit in the first place, we have dedicated guides on removing pet hair and getting smells out of a car - both are technique problems more than product problems.
One safety note worth more than any product recommendation: a car cabin is a small, sealed space, and interior chemicals are exactly the kind of product that off-gasses into it. Work with the doors open, and do not shut a freshly-cleaned car up in a hot garage with the windows closed.