Coated or uncoated: check before you buy
The test takes ten seconds. Put a single drop of water on an inconspicuous part of the seat. If it beads and sits there, the leather is coated — which is almost certainly the case on any car built in the last thirty years. If it soaks in and darkens the surface, you have uncoated or aniline leather, which is rare, expensive, and needs specialist products rather than anything on this page.
For coated leather, the routine is clean then condition, and both steps are light. Aggressive cleaning wears the pigment layer; heavy conditioning just sits on top of it.
How to choose
Two-step kit or single conditioner
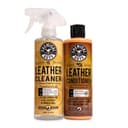
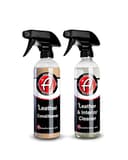
Cleaning and conditioning are genuinely different jobs, and the products that try to do both in one bottle are compromised at each. A two-bottle kit is the right default. A standalone conditioner makes sense if you already have an interior cleaner you trust, or if the seats are maintained and only need feeding.
UV protection
This is the specification that matters most for a car and least for furniture. Sun through side glass is what fades and eventually cracks a seat, particularly the outer bolster on the driver’s side. If the car parks outside, a conditioner with a stated UV-protection claim is worth prioritizing over one without.
Finish
Leather should look matte and feel dry to the touch when you are done. A glossy, slightly tacky seat means too much product, and beyond looking wrong it is genuinely unpleasant to sit on in shorts and slippery in a corner. Less product, worked in properly, always beats more.
The routine
Vacuum first, including deep into the seams and the gap between cushion and backrest — grit trapped in a seam acts as an abrasive every time someone sits down, and that is what wears the pigment off a bolster edge.
Apply cleaner to a soft brush or microfiber, not directly to the seat. Work a section at a time with light circular motion, concentrating on the areas that actually get dirty: the driver’s bolster, the seat base, and the top of the backrest where hair products transfer. Wipe the lifted soil away with a clean damp towel rather than letting it dry back into the surface.
Then condition — sparingly. A small amount on an applicator pad, spread thin and even, left for a few minutes to absorb, then buffed with a clean microfiber to remove anything that has not gone in. That buffing step is what separates a properly conditioned seat from a greasy one.
Two or three times a year is enough for most cars, more if it parks in full sun. For perforated leather, use minimal product and never let it pool in the holes — liquid that gets into a ventilated seat has nowhere to go. The rest of the cabin is covered in our interior detailing guide.