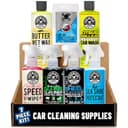
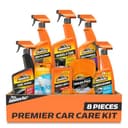
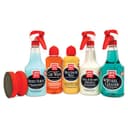
Kit or build your own? The honest answer
A kit wins on two things and loses on one. It wins on decision cost — somebody has already answered “what do I buy first,” which is the question that stops most people from starting at all — and it usually wins on price per bottle, because the bundle is discounted against buying the same chemicals individually. It loses on fit: every kit contains at least one bottle you will not use, and none of them contain the accessories that actually decide whether your wash scratches the car.
The practical answer for a first-time buyer is a hybrid, and it is the shape of this page: buy one starter kit for the chemicals, then buy the bucket, the mitt and the towels separately. That combination costs less than a single premium bundle, covers every step, and leaves you with accessories you keep long after the first set of bottles runs out. If you would rather skip the kit entirely and choose the single best product in each category, our best detailing products roundup does exactly that, and the budget picks do it for the lowest possible outlay.
What a beginner kit must cover
A complete first detail has five stages, and a kit is only complete if it has a product for each: wash the car, clean the wheels, decontaminate the paint, protect it, then dress the trim and clean the glass. Most starter kits cover four of those five and drop decontamination, because clay is the fiddly step. That is a defensible omission for a first wash — you can add a clay bar later, once you have felt how rough the paint is with a plastic bag over your hand — but you should know it is missing rather than discover it.
The four accessories no kit includes
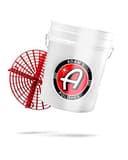
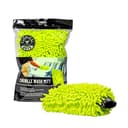
Here is the uncomfortable part: the accessories matter more than the chemicals. A mid-priced soap used with two buckets, a grit guard and a clean chenille mitt will leave better paint than a boutique soap used with one bucket and a sponge. That is not a marketing claim, it is mechanics — grit that goes back onto the mitt is dragged across the clear coat under hand pressure. The two-bucket wash method exists purely to break that cycle, and it needs two buckets and a grit guard to work at all.
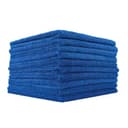
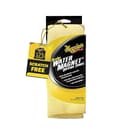
Towels are the second gap. Every kit gives you one or two; a real detail uses six to ten, because a towel that has been dropped on the driveway is finished and a towel loaded with wax residue smears rather than buffs. Buy a ten-pack of general-purpose microfiber and one large drying towel and you have removed the single most common cause of beginner swirl marks. The full case for each type of towel, and how to launder them so they last, is in the wash mitt comparison.
What to skip on day one
The fastest way to waste money as a beginner is to buy the equipment that looks most like professional detailing. Three things can wait.
A machine polisher
A dual-action polisher is a genuine enthusiast tool and it is not dangerous in the way a rotary is, but it removes clear coat — a finite resource. Learn to wash and protect without inflicting new defects first; correcting swirls you keep re-installing is a treadmill. Buy the polisher when the paint is clean, protected, and the only thing left to fix is old damage.
A ceramic coating
A real multi-year ceramic coating demands a fully decontaminated, corrected and panel-wiped surface, and it punishes a rushed application with high spots you then have to polish off. A ceramic spray or a hybrid wax gives you most of the water-beading and a good chunk of the gloss for a fraction of the risk, and it is the right protection step for your first year.
A pressure washer and foam cannon
Foam is fun, and a pre-soak genuinely lifts grit before you touch the paint — but it is an upgrade, not a foundation. A hose, two buckets and a good car wash soap get you 90 percent of the way. If you already own a pressure washer, add a foam cannon early, because it is cheap. If you do not, spend the money on towels first.
Your first detail, in order
Once the kit and accessories arrive, the sequence matters more than the products. Wheels first, while the paint is still cool and dirty, so brake dust and wheel cleaner never land on clean paint. Then rinse the car top to bottom, wash panel by panel with the mitt going straight lines rather than circles, rinsing the mitt in the second bucket after every panel. Dry immediately with a large drying towel before water spots form. Then protect, then dress the tires and trim, then do the glass last so you can wipe away anything the earlier steps flung onto it. The long-form version of that sequence, with what can go wrong at each step, is our complete detailing walkthrough, and the gentler introduction is car detailing for beginners.
One last piece of advice that costs nothing: work in the shade, on cool paint, and never let a chemical dry on a surface. More beginner damage comes from washing a hot black car in direct sun than from any product on this page.
One assumption worth checking before you buy any of this: every kit above takes for granted that you have somewhere to use a hose. If you park in an apartment lot or a garage with no tap, the starter setup is a different shape entirely — a bucket, a rinseless concentrate and a far bigger stack of microfiber than any kit includes. How to wash a car without a hose covers that version of day one.