Short answer: only when the paint feels rough, and the way to find out costs nothing. Wash the car, dry it, and run clean fingertips over the hood. If it feels like fine sandpaper instead of glass, you need clay. If it feels perfectly smooth, you do not — no matter how long it has been, no matter what a product page implies about an annual routine.
That is the whole decision, and it is worth being this blunt because claying is the step people most often do unnecessarily and most often skip when it actually matters. It is also mildly abrasive, so doing it “just in case” is not free.
The fingertip test, and what the three results mean
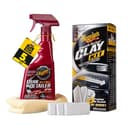
Meguiar’s publishes this test on its own clay kit page, and the language is useful because it is specific about what you are feeling. “Prior to waxing, wash and dry your car thoroughly, then inspect the surface by using your eyes and hands.” If the paint “does feel rough, what you feel is the presence of harmful environmental contaminants such as over-spray, fallout, brake dust, tree sap and more that have bonded to your paint finish” — roughness the company calls “micro speed bumps”. It adds where to look: generally the horizontal surfaces, plus “small, dark spots/specks on the rear and lower surfaces of a light colored car”.
Three outcomes, three different answers:
- Rough or bumpy → clay it.Washing cannot remove bonded contamination — Chemical Guys’ clay guidance lists brake dust, rail dust, industrial fallout, overspray, tar and sap as things that stay put through a wash. Clay is the tool that shears them off.
- Smooth but dull, hazy or swirled → do not clay, polish. Clay removes things sitting on top of the clear coat. Swirl marks and oxidation are damage in the clear coat, and no amount of claying touches them. This is the mistake that wastes the most afternoons.
- Smooth and glossy → protect it and move on. Wash, dry, wax or seal. Claying contamination-free paint is a small amount of needless abrasion and a large amount of needless work.
Two refinements worth knowing. Do the test on multiple panels, because contamination is not evenly distributed — a garaged car can have a glassy roof and gritty lower rear quarters. And do it after a real wash: loose road film feels identical to bonded contamination, which is why the test on a dirty car always says “clay it”. A two-bucket wash with a pH-neutral shampoo is the baseline the test assumes.
The answer changes depending on what you are about to do
“Do I need to clay” is really three questions, and they have different answers. This is the part most clay pages leave out.
Before waxing or sealing: optional, and governed by the test
Wax sits on top of whatever is already there. Wax over bonded fallout and you have sealed the fallout in, so the car feels and looks no better and the specks are now under a protective layer. If the test says rough, clay first. If it says smooth, skip it — this is the one scenario where skipping is genuinely fine.
Before polishing: close to mandatory
This is where skipping costs you. A polisher drags a pad across the paint under pressure, and any bonded particle still on the surface gets dragged with it. You are grinding grit across your own clear coat at speed. Griot’s prep guidance makes the broader point — prepping “reveals completely clean, bare paint” and “above-surface contaminants and old wax or sealant residue can drastically effect results in paint correction or future wax or sealant application”.
So before any machine work: wash, chemically decontaminate, clay, then polish. If you are planning a correction, read the paint correction guide for the full order of operations, and inspect the result under a detailing light rather than trusting your garage fixture.
Before a ceramic coating: mandatory, and then some
A coating chemically bonds to what it touches, and it is rated in years. Anything trapped underneath is trapped for the life of the coating, and the bond itself is weaker on a contaminated surface. Claying is not optional here — and claying alone is not enough either. Griot’s sells a dedicated prep step for exactly this reason: a degreaser to remove polishing oils and residues “prior to application of a protectant”, so the coating meets bare paint.
If a ceramic coating is where this is heading, our pages on how to apply a ceramic coating and whether a coating is worth it cover the prep standard the product actually needs. Under-prepping is the single most common reason a coating disappoints.
How often should you clay? Nobody publishes a number, including us
You will see “twice a year” repeated across the internet. We went looking for a manufacturer willing to publish a claying interval and did not find one — not on Meguiar’s clay kit page, not in Griot’s prep how-to, not in Chemical Guys’ clay guide. None of them publishes a frequency in months, and none publishes how many uses a bar gives. So we are not going to invent one.
That is not evasion — it is the correct answer, because the real variable is your car’s environment, not the calendar. A car parked under a lime tree next to a rail line accumulates bonded contamination in weeks. A garaged weekend car driven on clean roads may go years and still pass the fingertip test. Two cars in the same town can be a season apart. The test measures the actual surface; a frequency guesses at it.
If you want a practical rhythm: run the test every time you wash. It takes ten seconds and it converts an unanswerable scheduling question into an observation.
What claying does not fix
Clay has a precise job: it shears off what is bonded abovethe clear coat. Everything in the clear coat is someone else’s problem. Specifically:
| Problem | Will clay fix it? | What actually does |
|---|
| Rough, gritty feel | Yes — this is its job | Clay bar or clay mitt |
| Orange-brown specks on light paint | Partly | Iron remover first, then clay |
| Tar flecks on lower panels | Slowly, and it ruins the bar | Tar remover, then clay |
| Swirl marks and fine scratches | No | Abrasive polish on a machine or by hand |
| Dull, chalky, oxidized paint | No | Polishing compound |
| Etched water spots | No — the mineral is below the surface | Water-spot remover or correction |
| Published claying interval | Not published by any maker we checked | The fingertip test |
The order matters as much as the tools. Chemicals dissolve what they can, clay shears what is left, abrasives correct the clear coat, and protection goes on last. Our paint decontamination explainer covers why the chemical step comes before the mechanical one — in short, every gram of contamination a chemical removes is a gram your clay does not have to drag across the paint.
Clay bar or clay mitt?
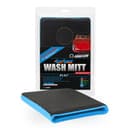
If the test says you need to clay, the second decision is the format. A traditional bar is cheap, conforms to curves, and is ruined the instant you drop it. A synthetic mitt or towel covers a car far faster and survives being rinsed, but costs more up front and is less able to get into tight areas.
Neither is “better”; they fail differently. We take the comparison apart properly in clay bar vs clay mitt, and iron remover vs clay bar covers the other common either/or (the answer there is both, in that order).
The method, in six lines
Claying is easy to do and easy to do damage with, and the difference is entirely about lubrication and pressure. Griot’s own prep page gives the technique: “move in short passes and use a cross-hatch pattern for uniform, thorough results”, “always work on a cool surface and apply very little to no pressure”, work from the top down and clean the most contaminated surfaces last, and re-lubricate and wipe the clay “every other panel or so. More often if the paint is especially contaminated”.
- Wash and dry the car. Clay on a dirty car is sandpaper.
- Work one small section at a time, out of the sun, on a cool panel.
- Soak the section in lubricant — a dedicated clay luber or a quick detailer. Never clay dry.
- Glide in short straight passes, crosshatched, with almost no pressure.
- Fold and inspect the clay every panel or two. When it is visibly dirty, fold to a clean face; when it is used up, bin it.
- Wipe the panel with a clean microfiber — then protect it, because clay strips whatever wax was there.
That last line is the one people forget. Claying leaves bare paint, so the car is less protected afterwards than before. Follow it with a wax, sealant or coating in the same session — see the wax roundup or the sealant picks. Our full how to use a clay bar guide covers the technique in detail.